How to Storyboard a Video The Complete Guide
When you're figuring out how to storyboard a video, the whole process really boils down to a few key actions: conceptualize your story, sketch out the most important scenes, detail the nitty-gritty of camera angles and character actions, and then refine the entire sequence before you even think about filming. Think of it as a visual blueprint that takes your abstract ideas and turns them into a solid, shareable plan. This gets your entire team on the same page right from the get-go.
Why Every Great Video Starts with a Storyboard
Long before the camera starts rolling, the most critical work is happening on paper or a screen. A storyboard is so much more than a few doodles in a box; it's the strategic heart of your video production. It's your creative sandbox—a place to experiment, make mistakes, and polish your vision without wasting a single dollar or minute of precious production time.
This pre-production step is also a killer communication tool. It aligns your director, cinematographer, and design team around a single, unified vision. Instead of trying to work off vague descriptions, everyone involved can see exactly how a scene is supposed to look and feel. This alone prevents so many expensive misunderstandings once you're on set.
The Strategic Advantages of Planning Visually
A well-made storyboard brings a ton of practical benefits to the table. By mapping out your video shot-by-shot, you can:
- Spot Narrative Problems Early: Does the story actually make sense? Is the pacing dragging in the middle? A storyboard makes these issues glare-out at you when they’re still easy and cheap to fix.
- Finalize Your Shot List: It forces you to think through every single camera angle, shot type, and transition. The result is a comprehensive and efficient shot list for your production crew.
- Secure Buy-In from Stakeholders: Showing a clear storyboard to clients or executives makes it a thousand times easier for them to grasp your vision, give meaningful feedback, and sign off on the project.
A storyboard is the ultimate trial run. It’s your chance to direct the entire video in its simplest form, making sure the final product is compelling, coherent, and exactly what you had in your head.
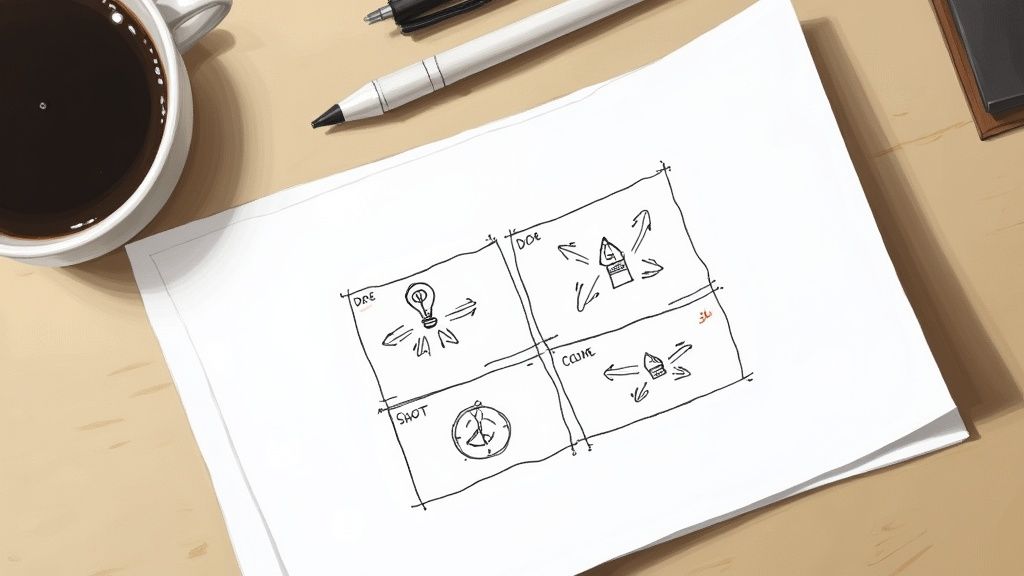
To really nail this, you need to know what goes into each panel. It's more than just a sketch.
Here's a quick reference table breaking down the key components you need to include in every storyboard panel for a clear and effective plan.
Essential Elements of a Video Storyboard
| Component | Purpose | Example |
|---|---|---|
| Panel/Scene # | Keeps your shots in chronological order and makes them easy to reference. | "Scene 3, Shot 1" |
| Visual Sketch | A quick drawing (stick figures are fine!) showing the shot's composition and subjects. | Sketch of a character looking at a laptop screen. |
| Camera Shot | Specifies the camera angle and distance (e.g., wide, close-up, over-the-shoulder). | "Medium close-up (MCU) on character's face." |
| Action/Motion | Describes any movement happening within the frame—by characters or the camera itself. | "Character types on keyboard. Camera slowly zooms in." |
| Dialogue/VO | Includes the lines spoken by characters or the narrator's voice-over for that scene. | "VO: And that's when she discovered the secret..." |
| Notes/SFX | Extra details like sound effects, music cues, props, or specific visual effects. | "SFX: keyboard typing. Music: tense, upbeat." |
Having these elements in your storyboard turns a simple idea into an actionable production guide that your whole team can follow.
Storyboarding in a Growing Industry
The value of this visual planning is undeniable across all creative fields. With the global animation market expected to hit a massive $400 billion by 2025, the need for efficient and crystal-clear pre-production has never been more intense. Data shows that 42.3% of filmmakers build storyboards specifically for story development, proving just how baked-in this step is to the creative process.
At its core, storyboarding is about crafting a powerful visual narrative. If you want to get better at this, it's worth exploring some advanced visual storytelling techniques. Remember, this simple tool doesn't require you to be an amazing artist—it just requires clear thinking and a focus on communication. Stick figures can be just as effective as detailed illustrations if they get the story across.
Laying the Groundwork Before You Draw a Frame
It’s tempting to grab a pen and start sketching right away, but that’s a classic rookie mistake. The best storyboards aren't about beautiful drawings; they’re built on a rock-solid strategic foundation. Before you even think about camera angles or shot composition, you need to step back and answer a simple but crucial question: what is this video for?
Every single creative choice you make from here on out will flow from that answer. A video's purpose shapes its tone, its pacing, and the entire story you're trying to tell. Are you here to teach, to entertain, or to get someone to click a button? Getting crystal clear on this is non-negotiable.
Define Your Primary Video Goal
First things first, you have to nail down your objective. Is this video meant to generate leads? Is it supposed to break down a complex topic? Or is it all about building brand buzz? Each of these goals demands a totally different storytelling playbook.
- To Educate: Your focus should be on clarity and a logical, step-by-step flow. The visuals need to back up the key learning points, not distract from them. For instance, when learning how to create training videos, the storyboard would favor methodical clarity over high-octane drama.
- To Entertain: This is all about grabbing and holding emotional engagement. You’ll need compelling characters and a story that keeps people watching. Pacing, suspense, and a satisfying ending are your best friends here.
- To Convert: A conversion-focused video is built around persuasion. Your storyboard must be a well-oiled machine designed to guide the viewer toward a single action, whether that's signing up for a demo or buying a product. Every frame should build desire and tear down objections.
Once you know your "why," figuring out the "who" gets a whole lot easier. You can't craft a message that hits home if you have no idea who you're talking to.
Understand Your Target Audience
So, who is this video really for? Don't just settle for basic demographics. What are their biggest frustrations? What kind of humor do they appreciate? What videos are they already watching and sharing? Knowing this helps you tune every part of your video—from the script to the visual style—to really connect with them.
A technical walkthrough for software engineers is going to look and sound completely different from a lifestyle ad for a new line of sneakers. One audience values precision and no-fluff information; the other is moved by aspiration and aesthetic appeal.
Don't make a video for everyone. Make a video for someone. Your message only sticks when it’s specific, and your storyboard is the first place to make that happen.
Outline Your Narrative Arc
Okay, you’ve got your goal and you know your audience. Now it's time to actually structure your story. Even a 30-second social media ad can benefit from a classic narrative structure: a beginning, a middle, and an end. It just feels right to the human brain.
I like to think of this in terms of "story beats"—the essential moments that propel the story forward.
- What's the hook that immediately grabs your viewer's attention?
- What's the core problem or tension you introduce in the middle?
- And what's the ultimate resolution or call-to-action that wraps it all up?
Just jot these beats down as a simple list. This outline acts as your roadmap, ensuring your storyboard has a clear purpose and transforms a jumble of cool shot ideas into a cohesive, powerful narrative.
Turning Your Script into a Visual Blueprint
Alright, you've got your script nailed down and your story beats figured out. Now for the fun part: bringing it all to life visually. This is where you swap your writer's hat for a director's cap and start making the creative calls that will define your video's entire look and feel.
Don't worry about creating a masterpiece. Your storyboard isn't meant for a gallery wall; it’s a practical tool for communicating your vision clearly. Think of each panel as a snapshot—a single shot or a key moment of action. The real goal is to go through your script, line by line, and ask yourself, "What's the best way to show this?"
Breaking Down the Script for the Screen
Every scene in your script is like a tiny story with its own beginning, middle, and end. Your job is to capture these moments in individual storyboard panels. A single line of dialogue might even need a few panels if the speaker's emotion shifts or the camera’s focus changes.
Let's imagine you're making a simple demo video for a new app. The script has a line that says, "Our new app simplifies your workflow with just one tap." How do you show that? You could break it down into a sequence of shots:
- A wide shot: We see someone looking totally overwhelmed, surrounded by stacks of paper and messy notes.
- A close-up: The shot tightens on their finger decisively tapping a single icon on their phone screen.
- An over-the-shoulder shot: The camera now reveals the app's clean, organized interface, a stark contrast to the previous chaos.
This process is where all your earlier planning—your goals, audience insights, and narrative—starts to take physical shape.
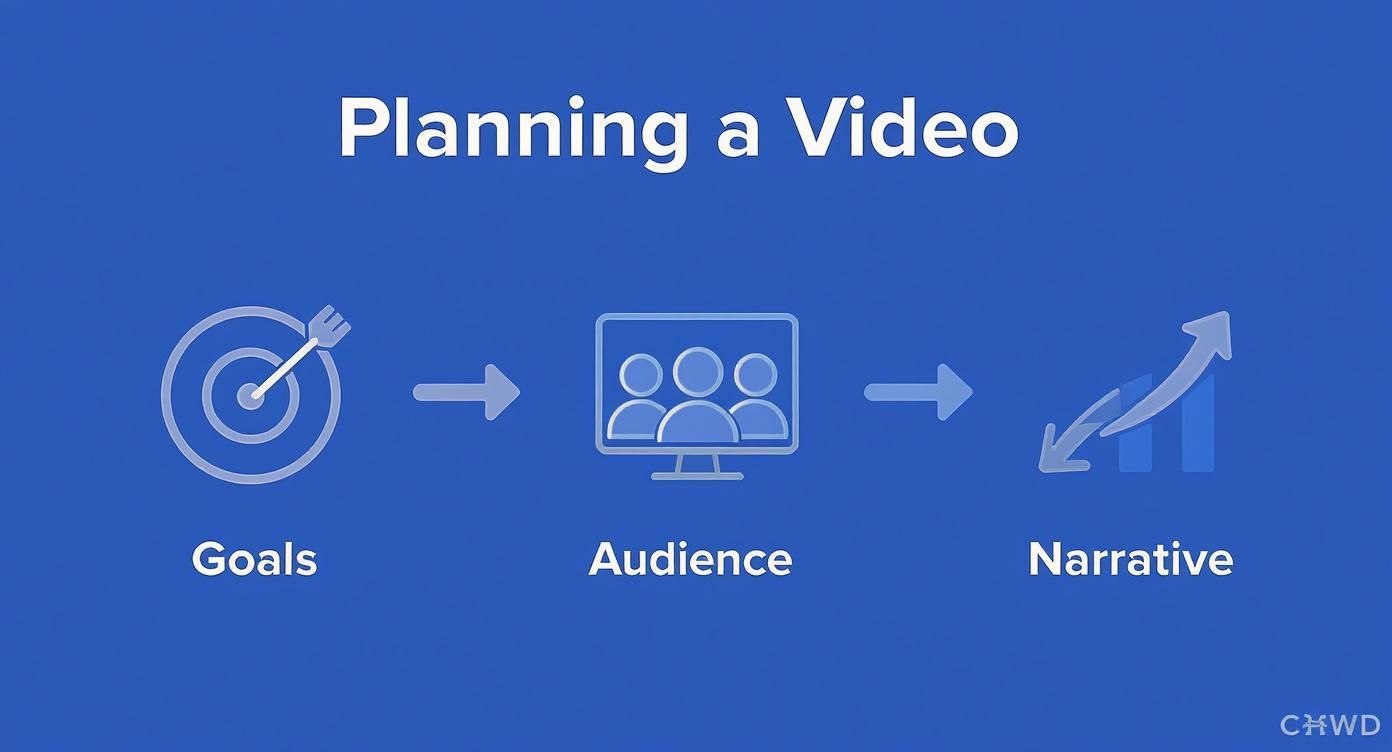
As the infographic highlights, a strong strategy is the foundation for everything you're about to map out visually.
Getting Smart with Shots and Angles
The camera angles and shot types you choose do most of the emotional heavy lifting. They send subtle signals to your audience, directing their attention and shaping how they feel about what’s happening on screen. As you're sketching out your scenes, remember the key principles of visual composition that give an image real power.
Pro Tip: Don't just show what's happening; show how it feels. A low camera angle can make your subject look powerful and heroic. A high angle? It can instantly make them seem small or vulnerable.
A tight close-up pulls the viewer in, creating intimacy and highlighting emotion—perfect for a powerful testimonial. A wide shot, on the other hand, sets the scene and gives context, which is great for introducing a new location. Think about movement, too. A slow pan across a landscape can feel epic, while a quick zoom can create a sense of urgency or discovery.
Picking Your Storyboarding Tools
You don't need expensive gear to get started. The best tool is simply the one that helps you get your ideas out of your head and onto the page (or screen) without friction.
- Pen and Paper: You can't beat the classics. It's fast, flexible, and has zero learning curve. A simple grid of boxes on a piece of paper is all you really need.
- Digital Software: Apps like Storyboarder or even presentation software like PowerPoint give you templates, digital assets, and the ability to edit on the fly. This has become the new standard. In fact, the storyboarding software market was valued at USD 450 million in 2023 and is expected to soar to USD 1.2 billion by 2033, showing just how much creators are leaning on these more efficient workflows.
- AI Video Generators: For a really quick visualization, you can use an AI video generator from text to create rough mockups of your scenes. It’s a great way to test the pacing and see if a visual concept works before you commit to drawing anything.
Whatever you choose, just be consistent. A clear, unified plan is exactly what your production team needs to execute your vision perfectly.
Breathing Life Into Your Storyboard With Critical Details
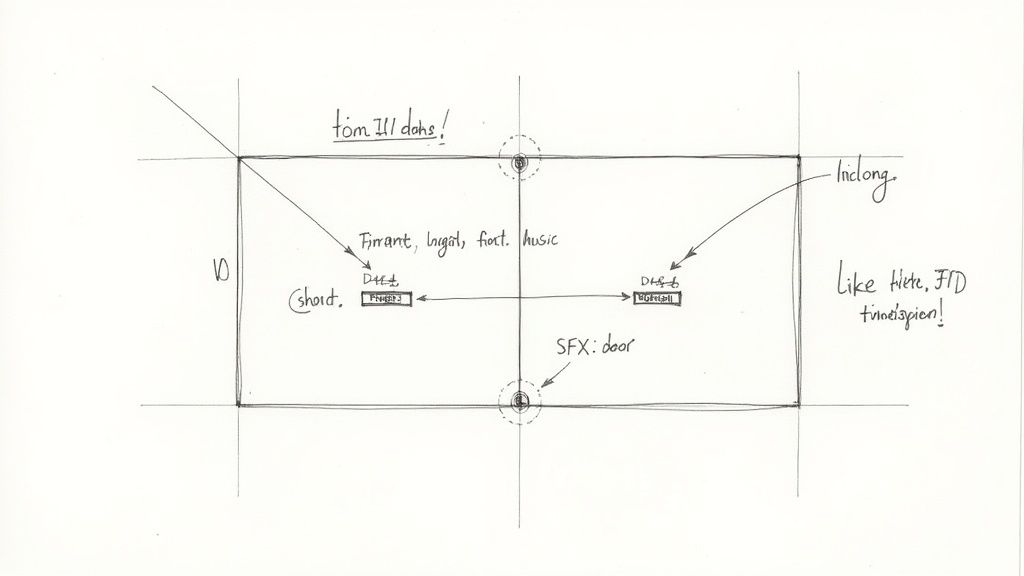
You’ve got the bones of your video now—the core shots are sketched out and the visual flow is taking shape. This is where we move from a simple outline to a full-blown production blueprint. It’s time to layer in the details that your crew, from the editor to the sound designer, will actually use: sound, timing, and transitions.
A silent storyboard is only telling half the story, isn't it? The audio—dialogue, music, sound effects—is just as vital as what's on screen. Your storyboard panels are the perfect place to connect those audio elements directly to the visuals, making sure nothing gets missed.
Mapping Out Audio Cues and Dialogue
For every panel in your storyboard, you'll want a little space for notes. We're not writing a novel here; just the critical audio information that accompanies the visual.
- Dialogue Snippets: Jot down the exact lines spoken in that shot. This is a great way to gut-check if the action on screen actually matches what's being said.
- Voiceover (VO): If you have a narrator, write their lines next to the corresponding image. This ensures the pacing feels right and the visuals are supporting the spoken words.
- Sound Effects (SFX): List out the important sounds. Does a character's phone buzz? Does a door creak open? A simple note like "SFX: Loud phone buzz" gives your sound team clear direction.
- Music Notes: Describe the vibe of the music. Something as simple as "Music: Upbeat synth track starts" is enough to set the emotional tone.
Adding these details turns a flat drawing into a multi-sensory experience, making it much easier for everyone on your team to get on the same page about the atmosphere you're trying to create.
A great storyboard anticipates the final edit. By including notes on sound and timing now, you're making decisions that will save hours of confusion and guesswork in post-production. It’s about building a complete vision on paper first.
Setting the Rhythm with Timing and Transitions
Beyond what we see and hear, the feel of a video comes from its pacing. How you move from one shot to the next and how long each shot lingers on screen is a massive part of video storytelling. This is where you dictate the rhythm.
Think about it: a slow, five-second shot of a sunset feels calm and reflective. A rapid-fire series of one-second shots with quick cuts creates energy and excitement. You have to plan this intentionally.
Essential Pacing Notes for Each Panel:
- Estimated Shot Duration: How long should this shot last? A simple "Est. Time: 3 sec" is perfect. This also helps you get a rough idea of your video's total runtime.
- Transition Type: How do we get to the next shot? Note if it’s a hard cut, a fade to black, a dissolve, or something more stylized. Transitions are powerful tools in your storytelling kit. If you're looking for inspiration, you can explore various video effects that can be planned right at this stage.
By adding these final layers of information, your storyboard is no longer just a series of sketches. It’s a rich, detailed document that communicates what the audience will see, hear, and feel, moment by moment. This is what professional video planning looks like.
7 Common Storyboarding Mistakes and How to Avoid Them
<iframe width="100%" style="aspect-ratio: 16 / 9;" src="https://www.youtube.com/embed/3AgrUC2F98M" frameborder="0" allow="autoplay; encrypted-media" allowfullscreen></iframe>
We’ve all been there. You get an idea, you start sketching, and somewhere along the line, the storyboard goes off the rails. Even seasoned pros hit these same roadblocks. Knowing how to storyboard a video is one thing, but sidestepping the classic mistakes that lead to confusion and expensive delays is the real skill.
Let's walk through some of the most common traps and, more importantly, how to climb out of them.
Trying to Create a Masterpiece
This is the big one. I see it all the time: creators spending hours making each panel a work of art. But a storyboard isn’t a final product; it's a communication tool. A blueprint.
The goal is clarity, not a perfect drawing. Your time is much better spent thinking through camera angles, character emotions, or story pacing. Honestly, stick figures and rough shapes work just fine as long as they get the point across.
Overstuffing the Storyboard
It’s tempting to illustrate every tiny movement and detail, but this usually backfires. You end up with a huge, dense document that nobody can follow. Your team gets lost in the weeds, and the core message of the scene disappears.
Focus on the key "beats"—the pivotal moments that push the story forward. If you can show an action with a single panel and a motion arrow, do it. Don't draw three frames when one will do the job.
Forgetting the Other Half of the Story: Sound and Time
This is probably the most damaging mistake of all: creating a "silent" storyboard. We get so caught up in the visuals that we completely forget to add notes on audio, timing, and transitions. A storyboard without these crucial details is only half a plan.
Think about it. When your editor or sound designer gets a storyboard with no audio cues, they’re essentially flying blind. This leads to guesswork, creative misunderstandings, and a lot of expensive rework down the line.
- The Fix: Before you call a panel "done," run through a quick checklist. Does it have dialogue? A voiceover? Key sound effects (SFX)? How long should this shot last? How does it transition to the next scene?
This isn't just for filmmakers. Detailed planning is the backbone of successful corporate animation, where clear communication is non-negotiable. As companies dive into augmented reality (AR) and virtual reality (VR), storyboards become the essential blueprint for building interactive worlds.
Storyboard Mistake vs. Smart Solution
To make it even clearer, here’s a quick-reference table to help you spot these issues before they become real problems.
| Common Mistake | Why It's a Problem | How to Fix It |
|---|---|---|
| Drawing Perfect Panels | Wastes time and energy on aesthetics instead of the story itself. Creates pressure to be an "artist." | Use stick figures and simple shapes. Focus on communicating the idea clearly and quickly. |
| Too Many Panels | Creates a cluttered, confusing storyboard that’s hard for the team to follow. The main narrative gets lost. | Focus only on the key story beats. Use arrows and notes to indicate motion instead of drawing every frame. |
| No Notes on Audio/Timing | Leaves sound designers and editors guessing, leading to costly rework and creative misalignment. | Add a section to each panel for dialogue, SFX, music cues, and estimated shot duration. |
| Ignoring Camera Angles | Results in a flat, visually uninteresting video. The emotional impact of the scene is lost. | Clearly label each shot (e.g., "close-up," "wide shot," "over-the-shoulder"). Sketch the shot framing. |
By catching these common mistakes early, you turn your storyboard from a rough idea into a powerful, actionable guide that your entire team can rely on.
Answering Your Top Storyboarding Questions
Once you have the basics down, a few practical questions almost always come up. I see these pop up all the time with creators who are new to storyboarding, so let's get them answered right away.
Do I Really Need to Be an Artist to Make a Storyboard?
Let's clear this up right now: absolutely not. This is probably the single biggest myth that stops people from even trying. A storyboard is all about clear communication, not artistic perfection.
Your Director of Photography doesn't need a gallery-worthy sketch. They need to understand the shot composition, where the talent is, and what's supposed to be happening in the frame.
Seriously, stick figures are your best friend here. They're fast, effective, and keep the focus where it belongs—on the story.
A storyboard is a blueprint, not a portrait. If your stick figure and a few arrows can clearly explain a complex camera movement, you’ve done your job perfectly. Clarity will always beat artistry in this context.
Plus, many digital storyboarding tools have libraries of pre-made assets. You can just drag and drop characters, props, and backgrounds into your panels without drawing a single line.
How Detailed Does My Storyboard Need to Be?
The honest answer? It depends. The right level of detail comes down to the project's complexity and your team's size.
Here's how I think about it:
- Solo Creator Project (like a YouTube video): You can probably get away with a "beat board"—just a few key frames that map out major scene changes or new camera angles. It's really just a guide to keep yourself on track.
- Team Project (a commercial, short film, etc.): This is where detail is king. Every shot needs its own panel, complete with notes on camera movement (pan, tilt, dolly), sound cues, dialogue snippets, and even specific character expressions.
A good rule of thumb is to add enough detail so that if you handed the storyboard to someone else on the team, they could grasp the entire video's flow without you saying a word. If the board can speak for itself, you've nailed it.
What's the Difference Between a Shot List and a Storyboard?
This one trips people up, but the distinction is actually pretty straightforward. Think of them as two parts of a whole; they work together but do very different jobs.
A storyboard is the visual plan. It shows what the video will look and feel like. A shot list is the logistical plan. It's a technical checklist for the day of the shoot.
| Feature | Shot List | Storyboard |
|---|---|---|
| Format | Text-based (usually a spreadsheet or list) | Visual (sketches or images in sequential panels) |
| Purpose | A technical plan for production day | A creative guide for the story's visual flow |
| What it answers | What shots do we need to capture? | How should each shot look and feel? |
Basically, the storyboard gives you the creative vision, and the shot list gives you the technical plan to execute it. You’ll build your shot list directly from your finished storyboard to make your filming day as efficient as possible.
Ready to see your storyboard come to life without getting bogged down in complicated editing software? With an AI video generator like Veo3 AI, you can turn your ideas—from simple text descriptions to images—into professional-quality videos in minutes. It's a fantastic way to bring your vision to life effortlessly.
Article created using Outrank